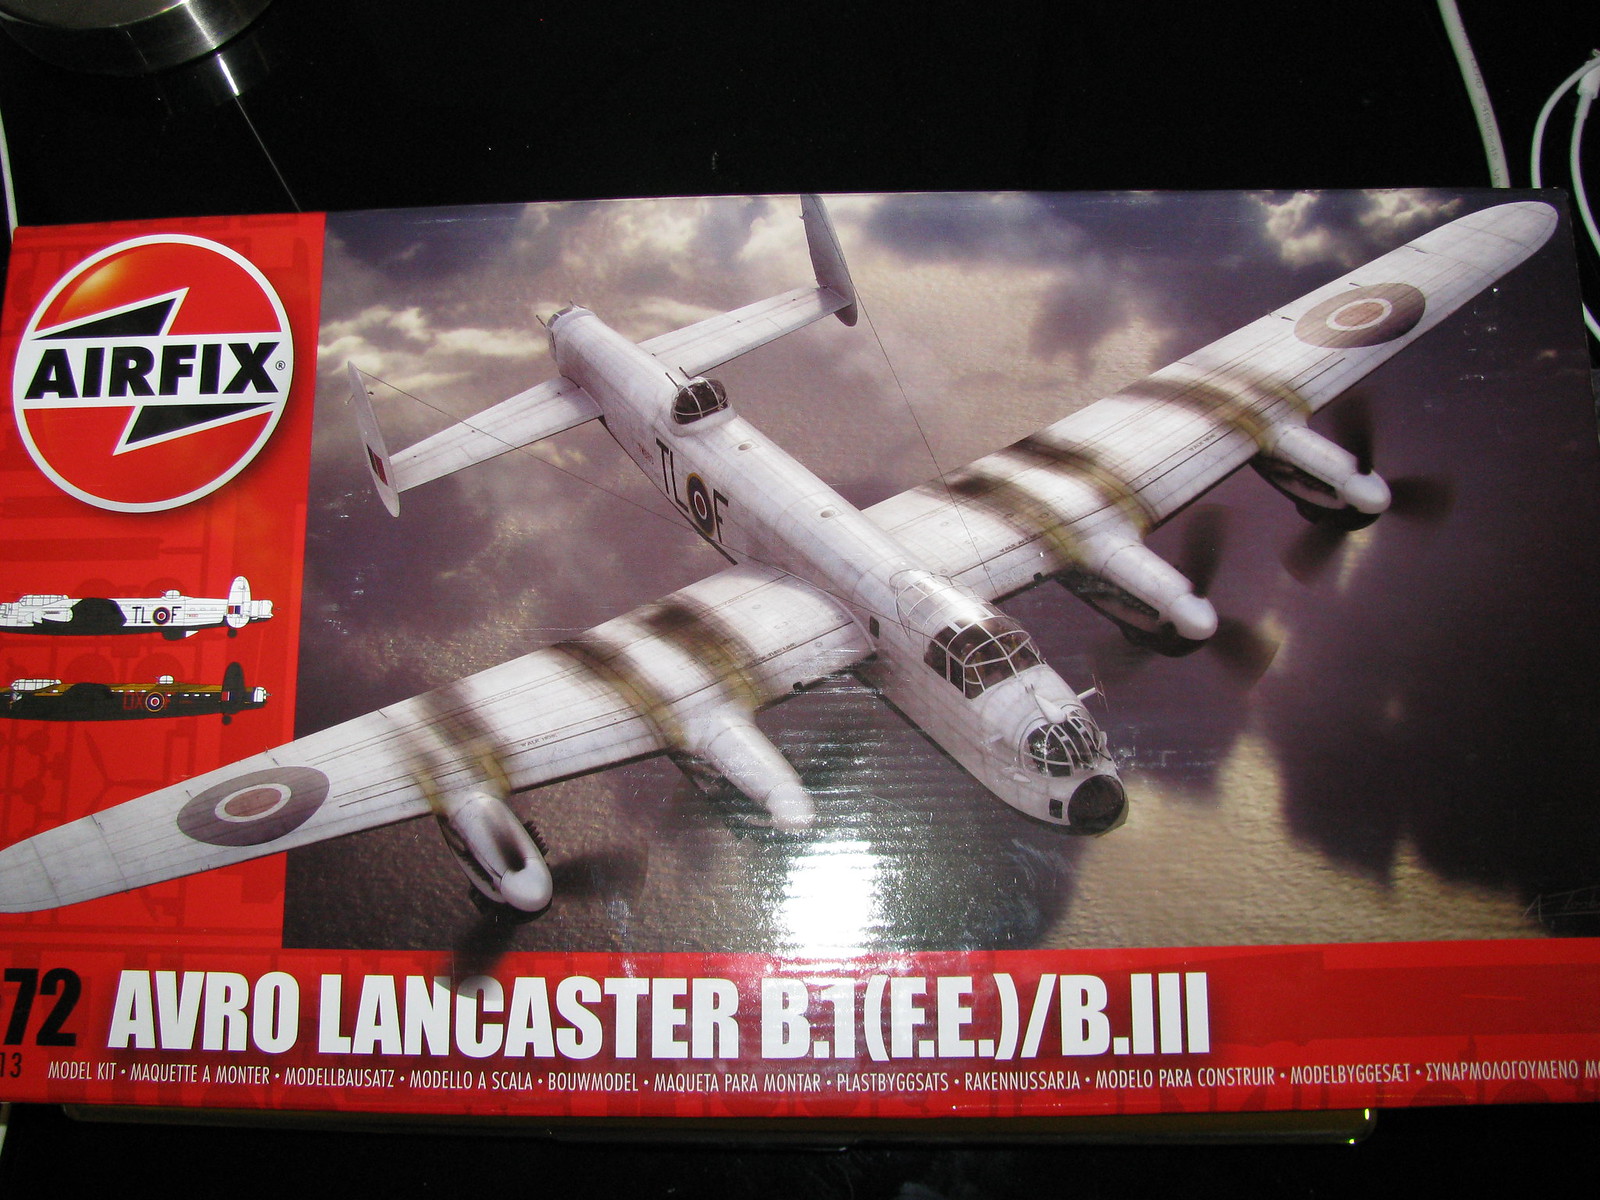
Saturday 10 June 2017

Airfix 1/72 B17G Flying Fortress

So my interest has moved to big bombers of WW2 and I went looking for the Lancaster, but they didn't have it but spied this one instead. I wanted to do the B17 at some stage so may as well be sooner rather than later. I have the Lancaster on order so it will make an appearance sometime in the future. For now this one is in the stash waiting.

Box Art

You can follow my build progress here.
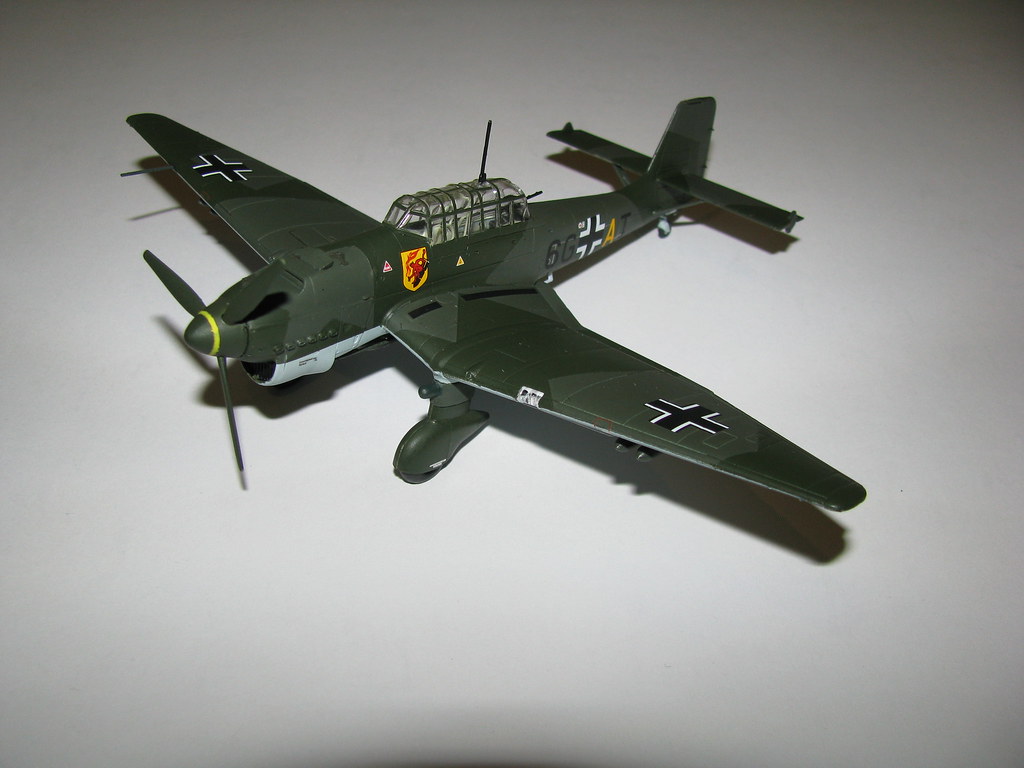
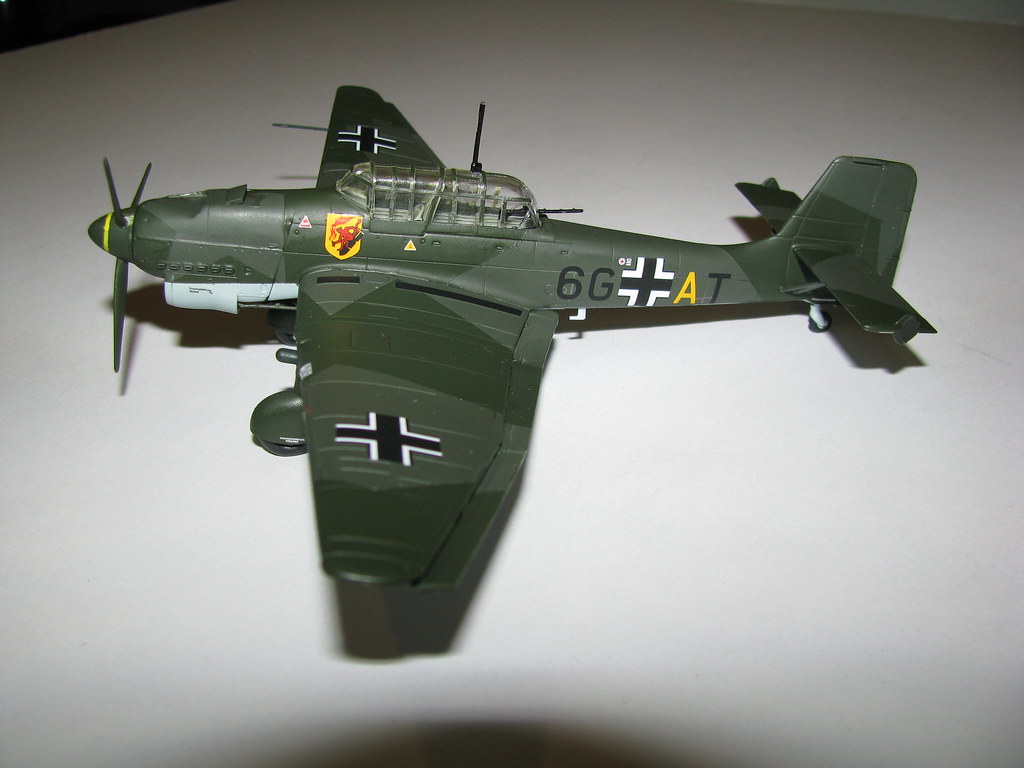
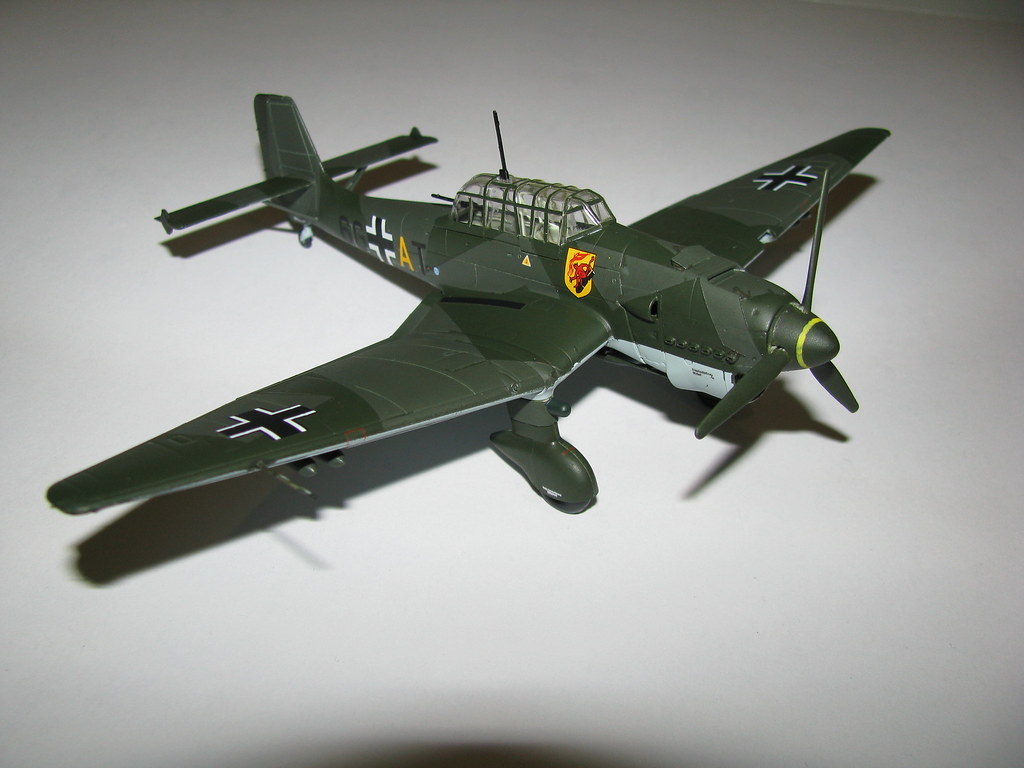
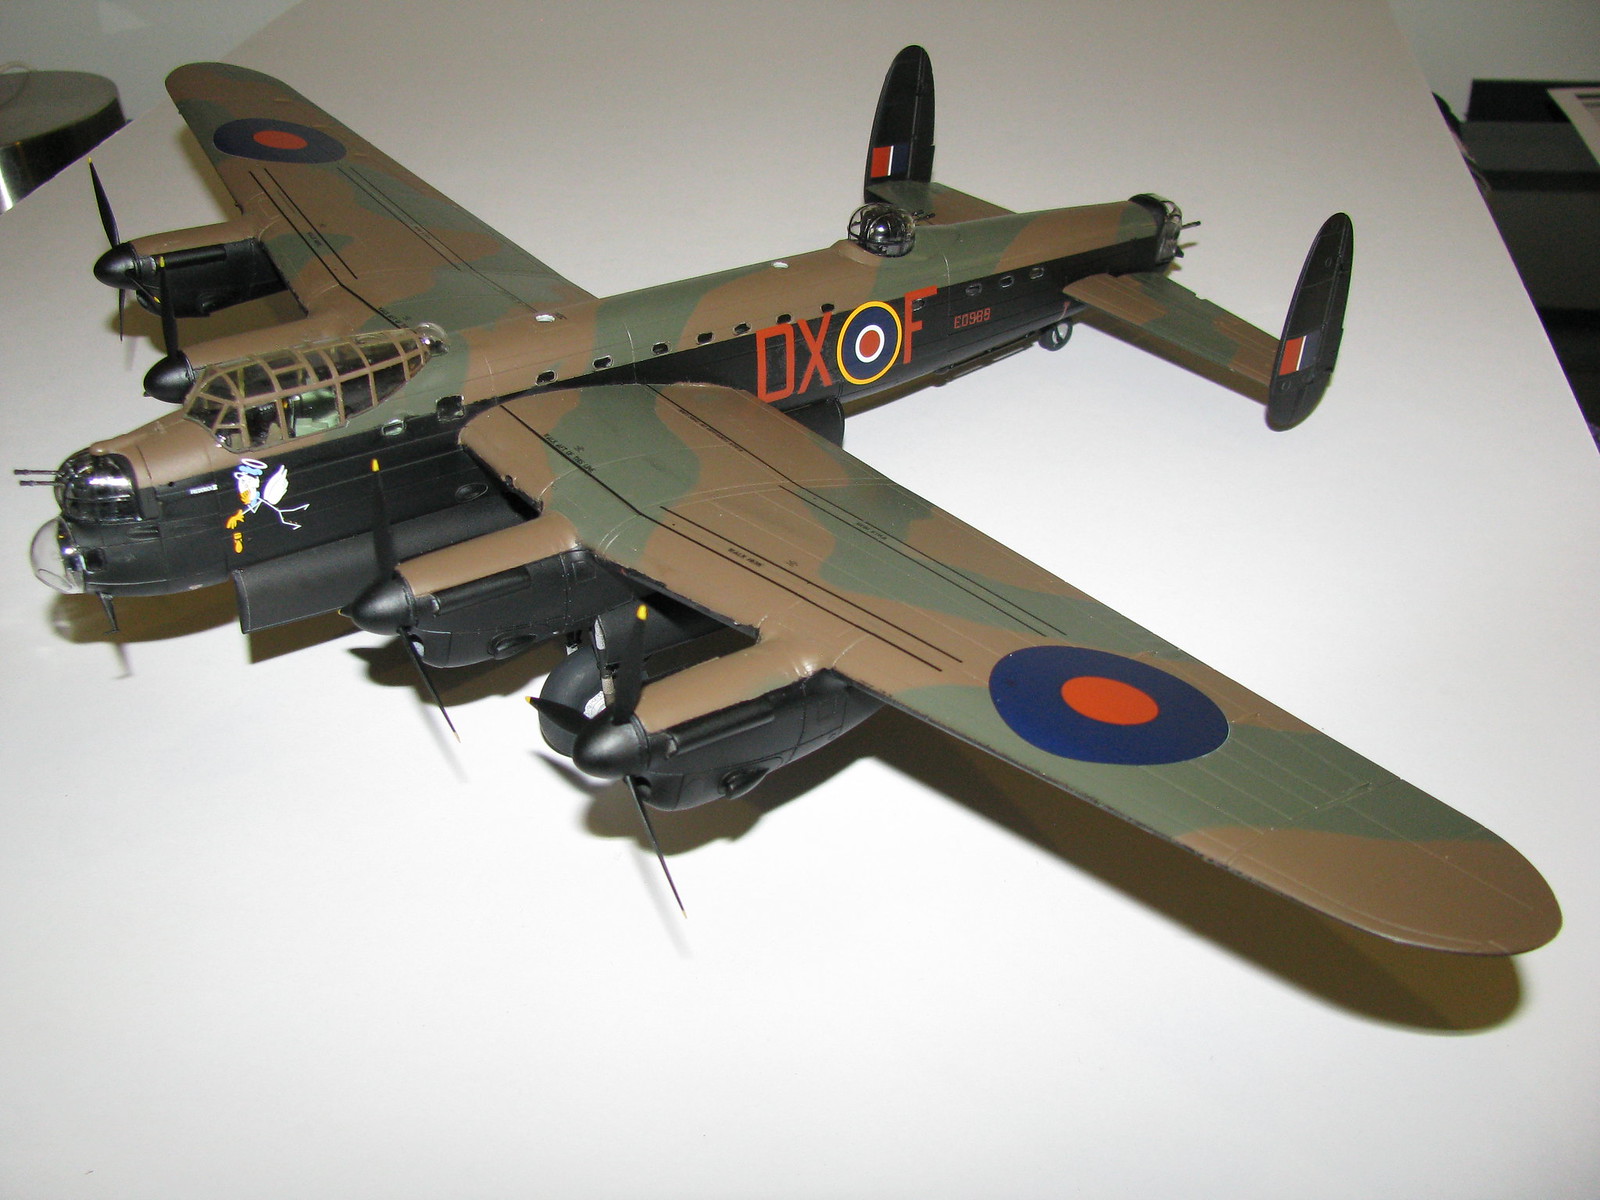
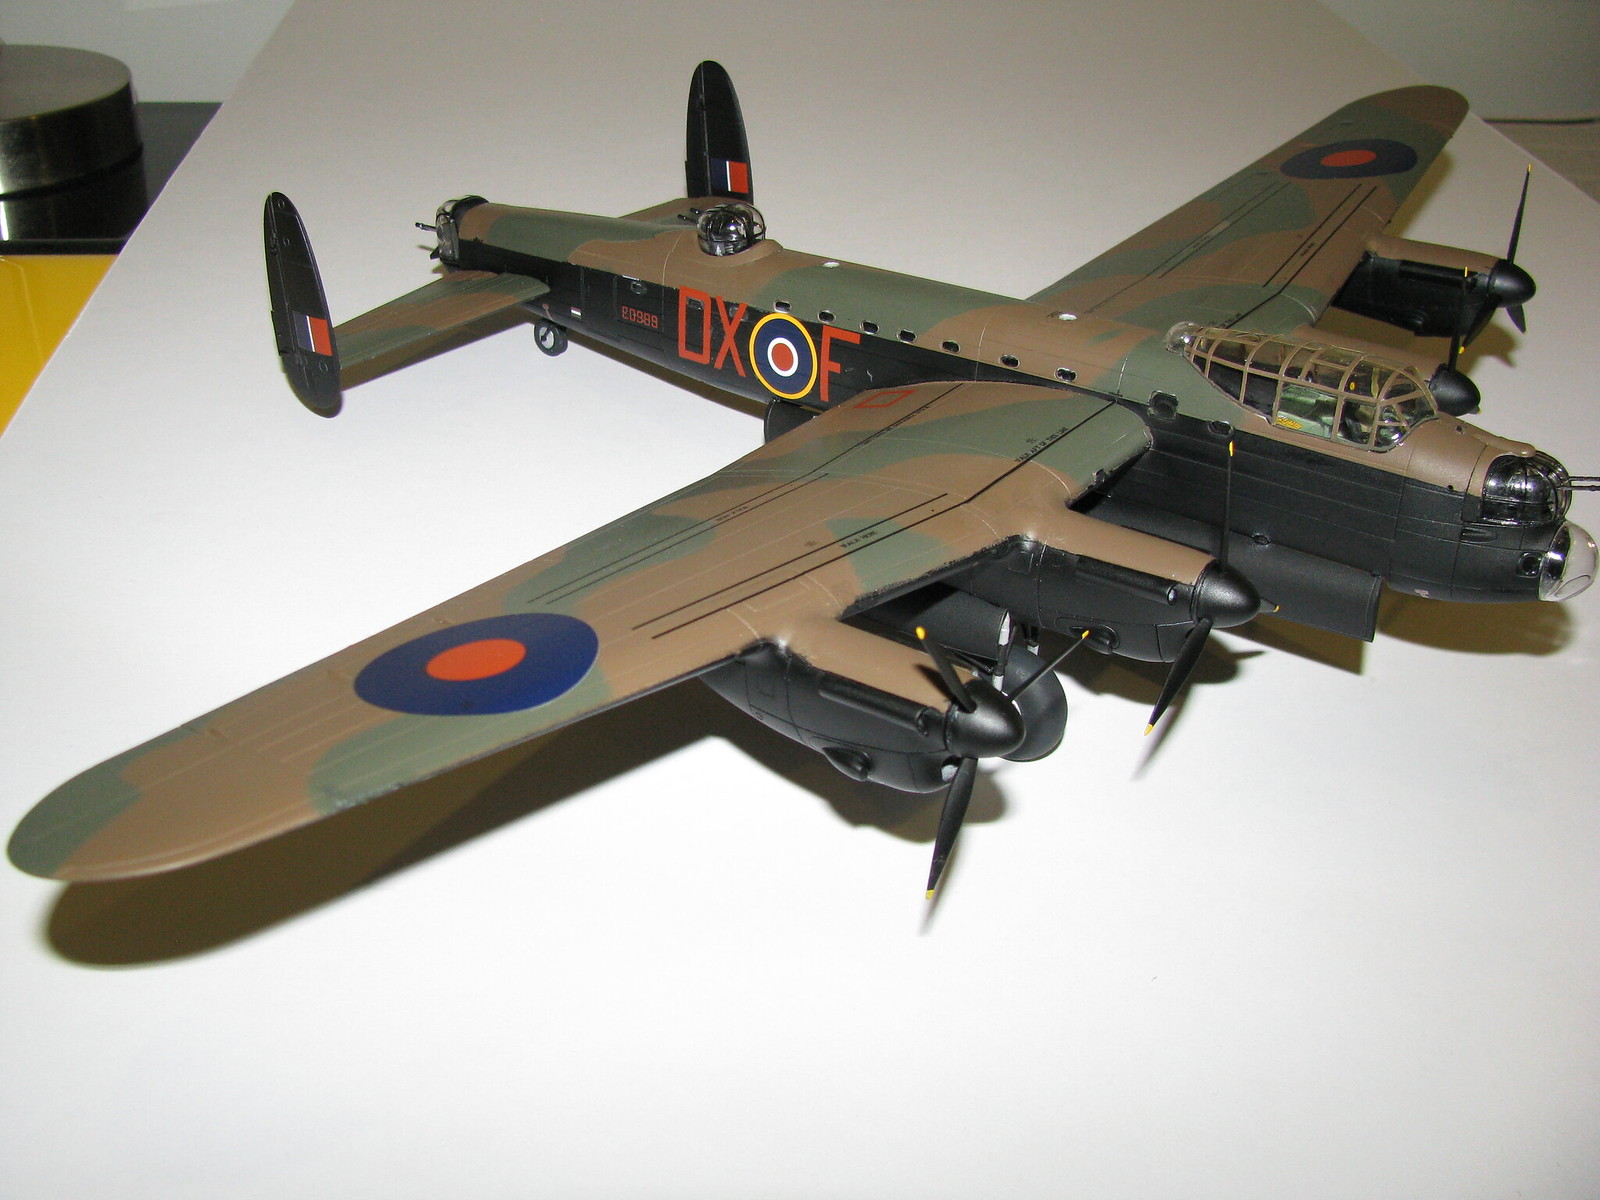
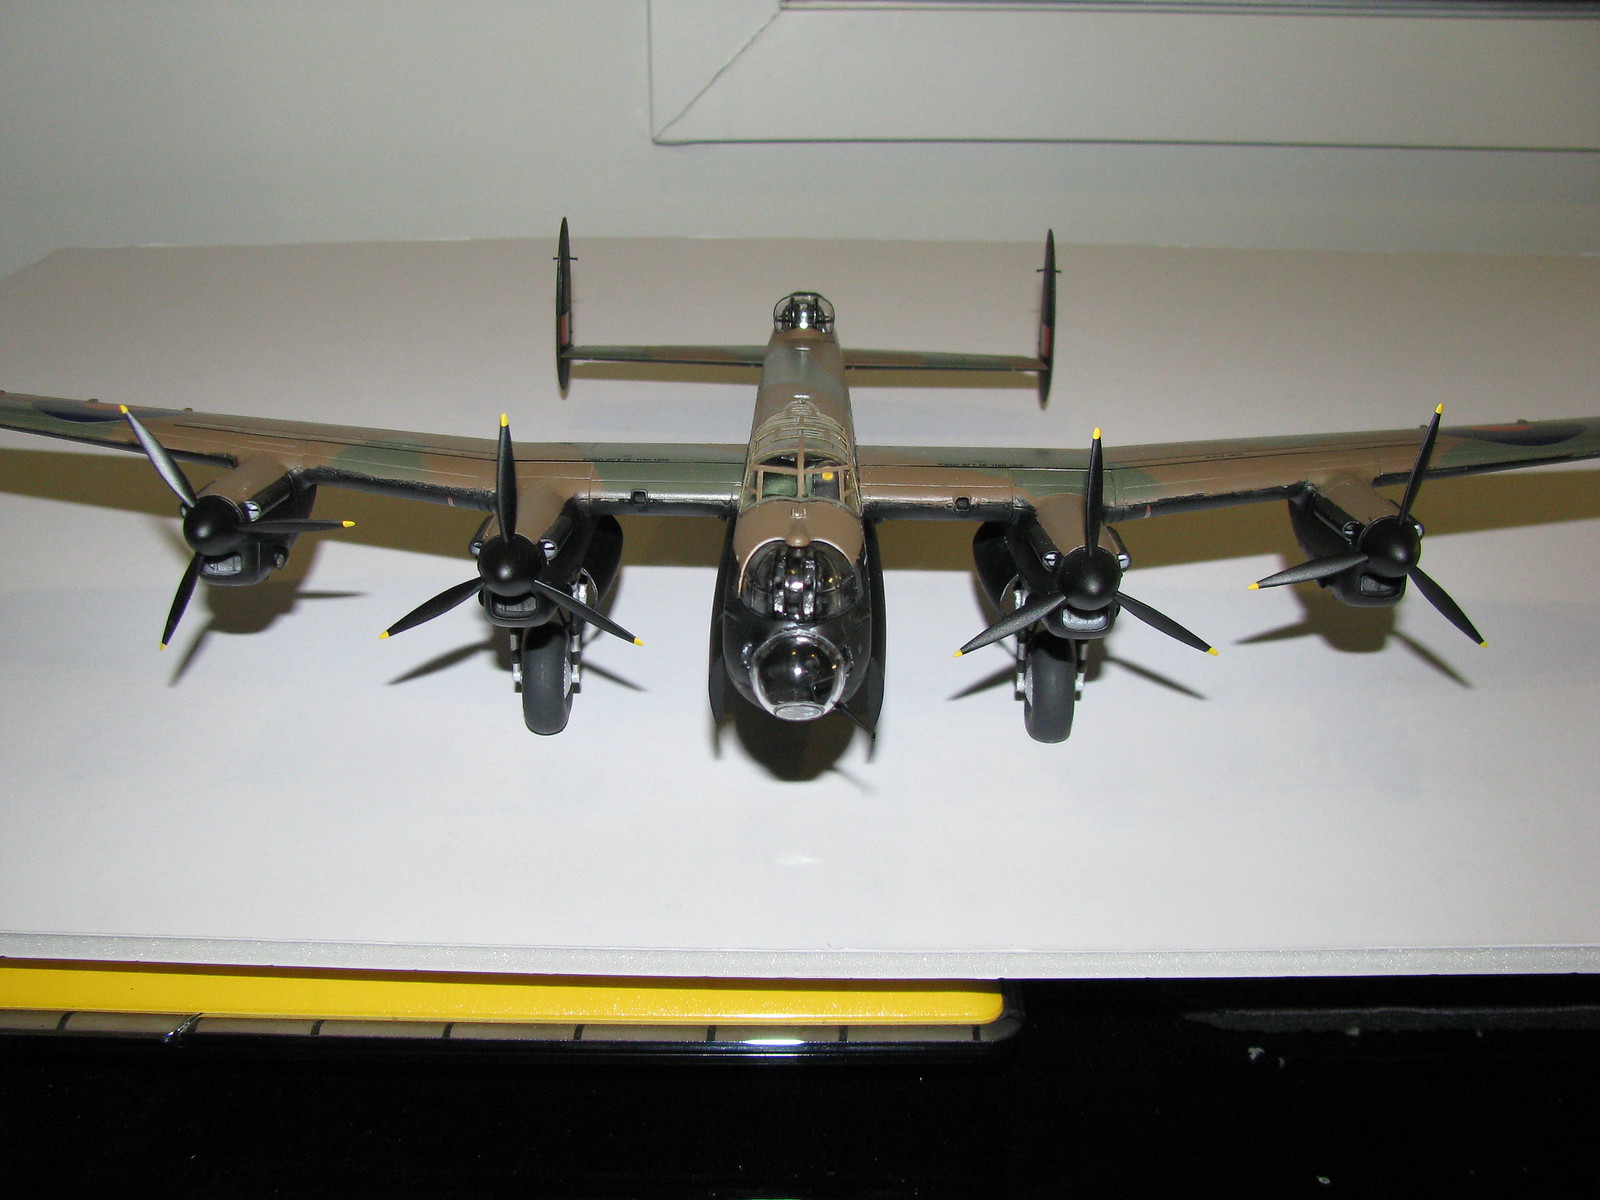
Finished Model

Comments
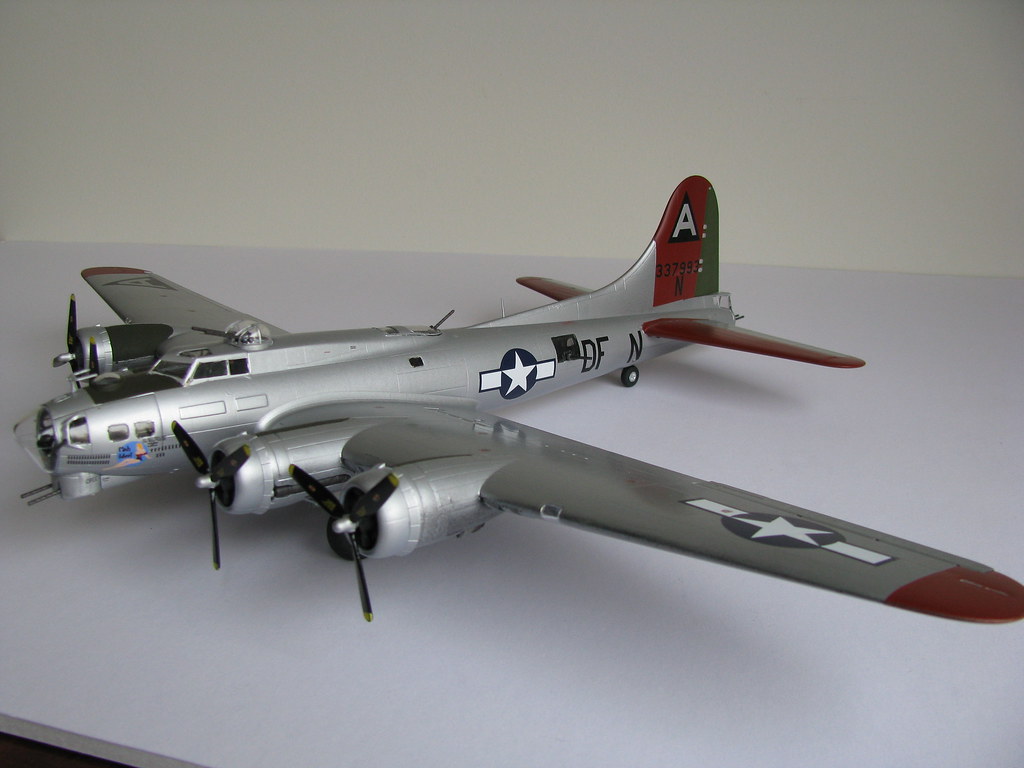
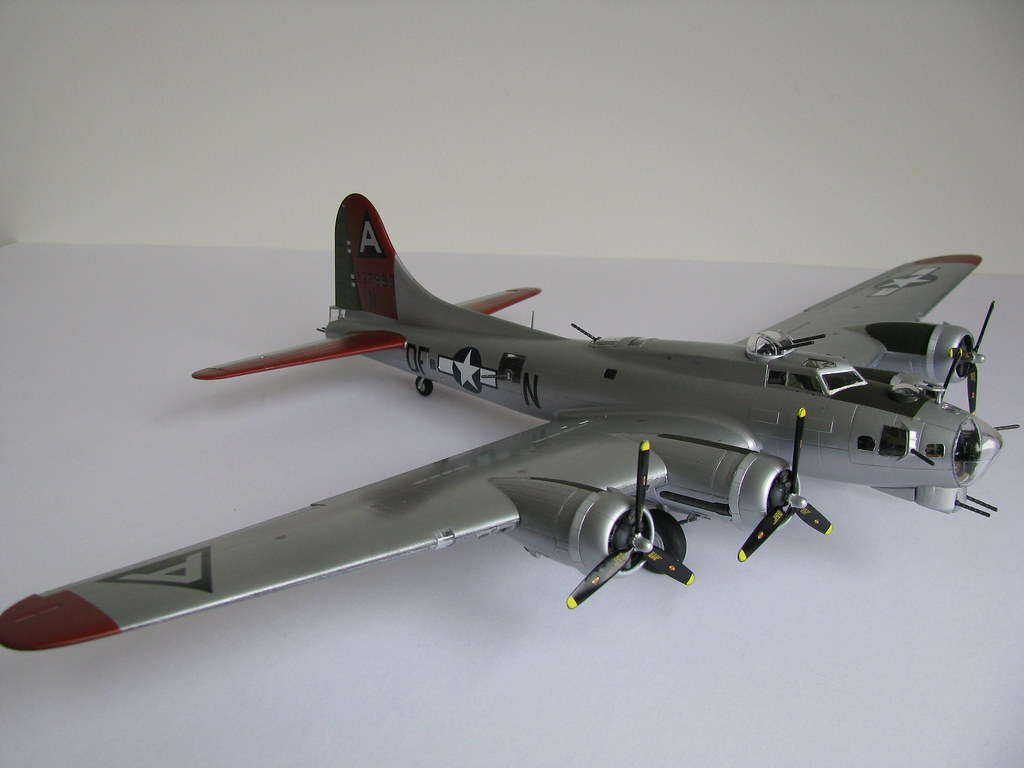
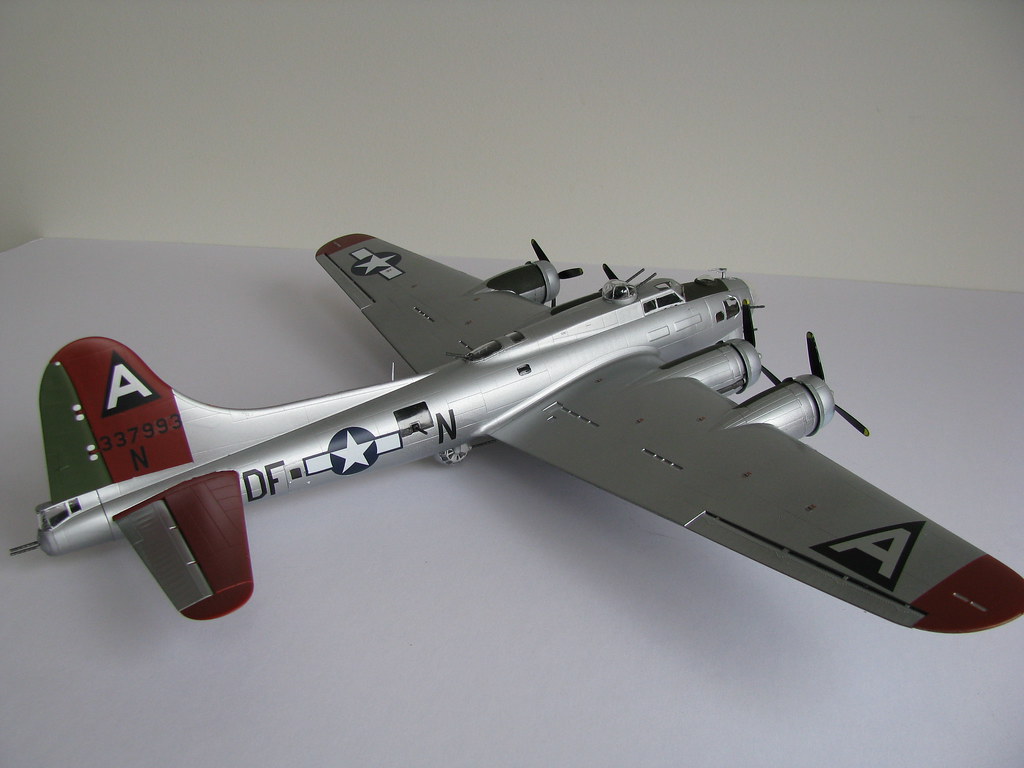
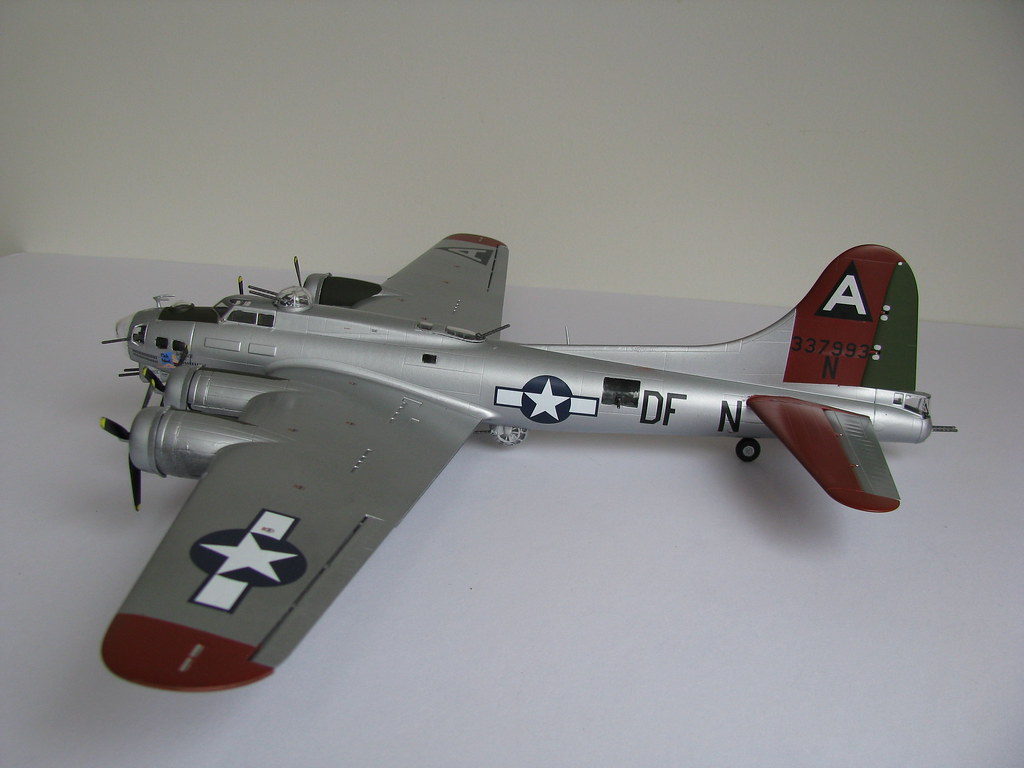
This was a great kit. The build was very easy, everything went together seamlessly, in fact wasn't much sanding and filling at all. I used Mr Hobby Mr Masking Sol R as there were a lot of clear parts and it worked very well. Definitely use again. The engine cowlings don't seem to attached very securely, so something to watch if you're building this one. Also the ball turret underneath is a very very tight fit, so much so that it scrapped all my careful paintwork off which was annoying. Next time I would enlarge the hole to make it fit less tightly. The internal detail of this kit is amazing, in fact the most I have ever seen for a 1/72 WW2 bomber. Pity most of it will never be seen from the outside world. But overall, a very enjoyable build.

Rating:
Instructions - 3 - very easy to understand

Assembly Complexity - 3 - Very straight forward, just follow the instructions.

Quality of Molding - 3 - Excellent quality, fine detail, no flash

Part Fit - 3 - Excellent, all parts fitted together perfectly.

Overall Score 12/12

Paints Used
Fuselage - Tamiya TS14 Gloss Black (need to use an undercoat for this stuff, dont spray it straight onto large surface areas) Tamiya AS-12 Bare Metal Silver (over the top of the gloss black)
Wingtips and Tail - Tamiya TS-33 Dull Red
Nose and Engine Cowlings - Tamiya XF-62 Olive Drab
Underside - Same as fuselage
Cockpit- Tamiya XF-16 Flat Aluminium
Wheels - Tamiya XF-85 - Rubber Black
Wheel Wells - Tamiya XF16 Flat Aluminium
Clear Coat - None for bare metal silver

Monday 22 May 2017

Airfix 1/72 Hawker hurricane MK.I

I couldn't have my collection of WW2 warbirds without the venerable Hawker Hurricane so I grabeed this one off the shelf. Only took 3 days to build so it was a quicky.

Box Art

Sprues
 
Completed Model


Comments
The kit was pretty good. I did have one problem where the wings didn't quite match fitting up into the fuselage and left a ridge that I had to fill with milliput. Other than this, the kit went together very well. There is also a weird overlap of the bottom wing pieces compared to the top wing half. The bottom is bigger and sticks out. I don't know if this is intentional, but I left it that way just in case it was. (being a fabric covered plane this may have been an effect).
I did stuff up a few things though. Put the canopy on and forgot to paint the fuselage underneath it. I also put testors dullcoat over a Mr Hobby Semi-gloss (I had run out of Tamiya Full Gloss for the decals) and the dull coat went all speckly. Really disappointing, but something to watch for in future. Its given the plan a weathered kind of look which I am not unhappy about.

Rating:
Instructions - 3 - very easy to understand

Assembly Complexity - 3 - Very straight forward, just follow the instructions.

Quality of Molding - 3 - Excellent quality, fine detail, no flash

Part Fit - 2.5 - Pretty good, most parts fitted together perfectly, just that one area with the wings meeting the fuselage near the engine.

Overall Score 11.5/12

Paints Used
Fuselage - Tamiya AS22 Dark Earth, Tamiya AS30 Dark Green (RAF)
Underside - Tamiya AS16 Light Grey (USAF)
Cockpit- Tamiya XF71 Cockpit Green
Wheels - Tamiya XF-85 - Rubber Black
Wheel Wells - Tamiya XF16 Flat Aluminium
Clear Coat - Testors Dullcote 1260 (DO NOT SPRAY OVER MR HOBBY SEMI GLOSS)

Saturday 13 May 2017

Airfix 1/72 Junkers Ju87B-1 Stuka

Got this one in the stash coming up. Every collection needs a Stuka. Seen some nice reviews so this should be a great build.

Box Art

Sprues


Finished Model

Comments
Great kit, didn't have any problems whatsoever. Nice clean plastic mould, crisp detailing and every part went together perfectly. Whats not to love. makes up into a very fine example of the Stuka. I did a lot of research for colours for this one as the dark green and really dark green was had to match in the Tamiya rattle cans. But I think I came up with a combination that works for me.
I also got to use my Celco circle template for drawing the yellow ring around the propellor. This worked surprisingly well, just using a yellow paint pen.

Rating:
Instructions - 3 - very easy to understand

Assembly Complexity - 3 - Very straight forward, just follow the instructions.

Quality of Molding - 3 - Excellent quality, fine detail, no flash

Part Fit - 3 - Excellent, all parts fitted together perfectly.

Overall Score 12/12

Paints Used
Fuselage - Tamiya AS24 Dark Green, Tamiya TS2 Dark Green
Underside - Tamiya AS5 Light Blue (luftwaffe)
Cockpit- Tamiya AS29 Gray Green

Wheels - Tamiya XF-85 - Rubber Black
Clear Coat - Testors Dullcote 1260

Friday 5 May 2017

Bandai 1/500 Space Battleship Yamato

Yes that's right fans, I am going to do the 1.500 starblazers yamato. A favourite cartoon of mine when I was young, I couldn't resist this big box when I saw it in the hobby shop. Truth be known I've been thinking about getting one for many years, but have never been able to find one. I know its something completely different from by 1/72 aircraft fetish, but I think its time for a break and do something completely different. This version is the latest tooling from Bandai, cost me $179AUD which is huge but I have heard great things about the quality.

Box Art

Monday 24 April 2017

Airfix 1/72 Lancaster B.III

Oh yes, that's right folks the venerable Lancaster. Who can resist this one. Threw my last one out during a move. Something I regretted, even though I built it when I was 15. Well its BACK!! May I introduce to you the Lancaster B.III.

Box Art
Sprue's


you can follow my build here.

Finished Model
I found some historical information about the aircraft which was interesting.


Aircraft Markings
"Frederick II" flown by Wing Commander Frederick Campbell Hopcroft, Commanding Officer No 57 Squadron, Royal Air Force Scampton, Lincolnshire, England, August 1943.


Comments
The Lancaster is quite a nostalgic aircraft and I can still remember when I built my first one as a 15 year old, a long long time ago. The new Airfix tooling is magnificent and I thoroughly enjoyed this build. The only minor negative comment is the bomb bay doors were warped, but a bit of superglue held them in place quite well. Otherwise, the kit was stunning in its detail and crispness.
The cockpit was quite detailed and you can see plenty through the canopy.
The other thing to note are the top fuselage escape hatches, these really should be clear plastic not just dents in the roof, Mr Airfix!. The landing gear is excellently detailed and I put mine in the flaps down position just for added variety.

Rating:
Instructions - 3 - very easy to understand

Assembly Complexity - 3 - No complexities in this one, just a big kit.

Quality of Molding - 3 - Excellent quality, fine detail, no flash

Part Fit - 3 - Excellent part fit, only minor negative was the bomb bay doors, but I wont take marks off just for that as its easily fixable.

Overall Score 12/12

Paints Used
Fuselage - Tamiya AS-22 Dark Earth, Tamiya AS-30 Dark green 2(RAF)
Underside - Tamiya TS-6 Matt Black
Cockpit- Tamiya XF-71 Cockpit green
Wheel wells - Tamiya XF-71 Cockpit green
Wheels - Tamiya XF-85 - Rubber Black
Clear Coat - Testors Dullcote 1260

Sunday 16 April 2017

Airfix 1/72 Bristol Beaufighter TF.x

Will be starting this one after I finish the Focke Wulf 190 in the same set.

Box Art

Finished Model


Comments
Nice easy kit. Very nice detailing by Airfix. Everything went together very smoothly.

Rating:
Instructions - 3 - very easy to understand

Assembly Complexity - 3 - Very straight forward, just follow the instructions.

Quality of Molding - 3 - Excellent quality, fine detail, no flash

Part Fit - 2.5 - Good part fit mostly, Had trouble with the wing fit, the spars don't push up enough into the fuselage and then the wings don't align when the are attached. The engine cowlings could have been done a bit better than a three piece, always looking for trouble when you have to fit three pieces into a round circle. No reason they couldn't have done the engine cowling as a single piece.

Overall Score 11.5/12

Paints Used
Fuselage - Tamiya AS-31 Ocean grey (RAF)
Underside - Humbrol 90 Beige green (came with the kit, very grainy)
Cockpit- Tamiya XF-71 Cockpit green
Wheel wells - Tamiya XF-71 Cockpit green
Wheels - Tamiya XF-85 - Rubber Black
Clear Coat - Testors Dullcote 1260

Airfix 1/72 Focke Wulf Fw190A-8

Time for a new set. I picked this one up a while ago as it was quite cheap for the two of them. Going to build the Focke Wulf first.

Box Art

Sprues

Instructions 
Thought I would make special mention of the instructions as these are very well laid out and rather than the normal wire diagrams, Airfix have actually put a bit more substance into the drawings, probably to make it more obvious for the younger fans.
 

Finished Model


Comments
I've started this one and first impressions so far are ok. A few problems with fit and some very minor flash. The most trouble was around the engine cowling and the top machine gun fuselage. It didn't quite go together perfectly and there were some seams to fill.The rest of it was ok and it builds up into a nice little model. They could have offered some more options in the kit for decals as there is only one choice and this version of the Focke Wulf had a wide variety of different colour schemes. Detailing is nice on all the panels, except the wheels which seemed to lack finesse.


Rating:
Instructions - 3 - very easy to understand

Assembly Complexity - 3 - Requires moderately experienced person to do this one

Quality of Molding - 2 - Lost points because some of the parts could be crisper, especially the wheels and some parts did have a very minor amount of flash.

Part Fit - 2 -Most parts ok, but the engine cowling and nose area left seams and gaps.

Overall Score 10/12

Paints Used
Fuselage - Tamiya TS2 - Dark green, Tamiya AS31 - Ocean Gray 2
Underside - Tamiya AS5 - Light Blue (Luftwaffe)
Cockpit- Humbrol Acrylic 27 - Sea Grey (comes with the kit)
Wheel wells - Tamiya XF71 - Cockpit green
Wheels - Tamiya XF-85 - Rubber Black
Clear Coat - Mr Hobby 503 Matt Clear


Friday 31 March 2017

Academy 1/72 F/A-18C "Chippy Ho" Hornet

This one is in the stash, looking forward to it, I've always wanted an F/18 in the collection, although the decals on the nose look daunting.

Box Art

Finished Model


Comments
This was a great build. I have built academy kits before and have not had much joy with them, but the online reviews said this was a good kit so I approached it with caution. I need not have been worried the molding and part fit was excellent and with care and patience, this builds into a very accurate F/A 18c aircraft. I do question the Tamiya light and dark ghost grey I used as they appear too blueish and dark to me, but I know having been up close to an F/A 18, they can be blueish in the right light. I also debated going semigloss or matt, but in the end, I went matt only becuase I know being up close the aircraft are always matt and you never see any shine on them. I think I made the right choice.
I learnt a lot on this kit and developed a few new skills around seam line filling using glue instead of filler, but overall I was very happy with the way it turned out and this will make a fine addition to the collection.

Rating:
Instructions - 3 - very easy to understand

Assembly Complexity - 2 - Requires moderately experienced person to do this one

Quality of Molding - 3 - Excellent quality, fine detail, no flash

Part Fit - 3 - Excellent part fit, but be warned its not a snap fit kit, it requires finesse and patience to align all the parts exactly.

Overall Score 11/12

Paints Used
Fuselage - TamiyaAS25 - Dark ghost Grey
Underside - Tamiya AS26 - Light Ghost Grey
Cockpit- Tamiya XF-53 Neutral Grey
Wheel wells - Tamiya XF-2 Matt White
Jet Exhaust - Tamiya X-10 - Gun Metal on outside and XF-84 Burnt iron on the inside
Antiglare strip - Tamiya XF-1 Flat Black
Wheels - Tamiya XF-85 - Rubber Black
Clear Coat - Testors Dullcote 1260

Airfix 1/72 Douglas A-4B Skyhawk

Big fan of this plane, not a big fan of this kit from Airfix, read on...

Box Art


If you want to see the build progress click here

Finished Model


Comments
Ok, this was not a happy build. I don't know if i was cursed, going through a form slump or it was the below average quality of the kit or all three, but I didn't enjoy this kit at all.
It makes into an accurate enough rendition of the venerable skyhawk but putting it together was a bit of a pain.
Firstly the parts:
- Airfix have attached the parts to the sprue with needlessly thick sprue lugs and it made cutting a bit more risky that it needs to be, not to mention the cleanup afterwards.
- There was a large gouge on the left hand fuselage piece. Fortunately a large decal covers it.
- The missiles and bombs slot does not fit into the bomb rack as its too small
- The drop tanks do not fit together evenly and require sanding to make them align properly
- The wing gunport pieces have a large curve at the end of them that needs to be straightened out at the risk of breaking the piece
- The cockpit canopy won't sit flush unless you carve a bit off where it hinges onto the fuselage
-The wheel covers for the main undercarriage do not fit correctly into the fuselage slots because the lugs are too big
- The panel lines oh the panel lines - these are trenches that give the star wars death star trench a run for its money - why Airfix?
- The decal for the "danger" label on the air intake does not fit. The air intakes are convex cone like in their shape and there is no way a straight line red decal is going to fit around it. I had to cut them and somehow work them so they could resemble a red line, but it was an unsatisfactory job.
- No decals for the tailhook striping - what kit doesn't provide that these days?

All in all a very unsatisfactory experience and clearly a kit that was designed by the Airfix "B" team as its nothing like the quality of their other new toolings.
Don't get me wrong, jsut about everyone of these issues is fixable with a little amount of effort (except the decal idiocy) but that's not what I expect from Airfix in 2017.

Rating:
Instructions - 3 - very easy to understand

Assembly Complexity - 3 - very easy to assemble

Quality of Molding - 2 - Ok but can be better, there were some defects in the kit components and very thick sprue attachments.

Part Fit - 1 - Unsatisfactory - quite a few components don't fit well. I have seen much worse, but this is clearly the Airfix "B" team new tooling.

Overall Score 9/12

Paints Used
Fuselage - Tamiya AS16 Light Gray (USAF)
Underside - Tamiya Matt White
Cockpit- Tamiya XF-53 Neutral Grey
Wheel wells - Tamiya Matt White
Jet Exhaust - Tamiya X-10 - Gun Metal
Antiglare strip - Tamiya XF-1 Flat Black
Leading Edge - Humbrol 19 - bright red (Had some left over fmor years ago - never again stuff takes too long to dry and doesn't like Tamiya Gloss Clear)

Friday 24 March 2017

Airfix 1/72 Hawker Siddley Harrier GR.1

Picture this, I am at the hobby store, I have my next models under my arm, the Airfix Beaufighter/Focke Wolfe 190 double set, ready to go to the counter when I walk past a display table with a sample of their finished models on it. Staring at me were some F18,s Harriers, Sabre's, Tomcats, etc so I stopped to have a gaze.
That motivational wave of WW2 fighters suddenly drained and the beaufighter/fw190 went back on the shelf in favour of a Harrier, Skyhawk and an F/18. Yep that's right, I'm moving onto jets. Maybe the WW2 streak will return because I still want to do those two, but for now we'll have a wave of 1/72 jets and the Harrier was always a personal favourite of mine.

Box Art

If you want to follow the build, go here.

Finished Model


Comments
Great build of this famous British VTOL jet. All parts went together very well, only exception being the bottom of the engine cowlings where they meet the fuselage but a bit of PVA glue filler was all that was required and the gap was filled nicely. The decals are a completely different story. There are a LOT of decals and they are very small so set aside lots of patience and time and don't do it all in one sitting or you will go mental.

Rating:
Instructions - 3 - very easy to understand

Assembly Complexity - 3 - very easy to assemble

Quality of Molding - 3 - Very good - New airfix tooling has been consistently excellent so far

Part Fit - 2.5 - all went together very well but lost marks because of the engine cowling not quite fitting right. Hopefully it wasn't me, but you never know..

Overall Score 11.5/12

Paints Used
Fuselage - Tamiya AS-31 - Ocean Gray 2 (RAF), Tamiya AS-9 - Dark Green (RAF)
Underside - Tamiya AS-16 - Light Grey (USAF)
Cockpit- Tamiya XF-53 Neutral Grey
Wheel wells - Mr Color 332 Light Aircraft Gray <-- found out I have to use special Mr color thinners to clean brushes, never buying these again.
Jet Exhaust - Tamiya X-10 - Gun Metal